 |
 |
|
|
| To our valued customers: On this page, you will find details regarding the materials, method, and manner of construction of our "Patent Pending" ghillie suit and related products. These details are provided so that you can see the value, originality, and many benefits of our products. No license of any kind, express or implied, is granted in our placing these details on the site. Rather, we assert and retain all rights, without limitation in the ghillie suit and in its method and manner of construction. We appreciate your patronage and look forward to serving your needs." |
|
|
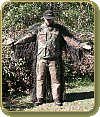 |
How to Convert the "Stalker" suit to a pair of BDU's Just follow these steps listed below! |
 |
|
|
| Supplies needed: 1-"Stalker" suit, the color of your choice 1-Pair of Military BDU's 1-Yard of brown canvas material 1-Roll of foam padding 2-3 tubes "Shoe Goo" |
|
|
| STEP 1. Lay out your "Stalker" suit, and your BDU's. | ||||||||
|
|
|
| STEP 2. Count up 30", or 30 squares of the netting on the rear of the "Stalker". Cut across on the 31st square leaving 30", or 30 squares. | ||||||||
|
|
|
| STEP 3. Starting at the bottom of the cut netting, count 14", or 14 squares over, and cut on the 15th going up 22", or 22 squares to separate the two pant legs. Do the same for the other leg, count 14", or netting squares, and cut on the 15th square on up 22"-25", or squares. (What you have done is removed one (1) extra square in the middle of the netting, and 22 -25 total squares up, which will be the crotch of the pants.) | ||||||
|
||||||
| ! Notice how the pants line up on the netting. The top piece is under the belt line, and just below the front pocket. And the bottom netting is about 4-6" away from the bottom of the pants. This is so the netting wont be stepped on, and the Jute you see still hangs down below the bottom pant cuff. |
|
|
| STEP 4. Cut off the extra netting around the pant legs so just an inch or so wraps to the front. See in the photo that there is too much on the right hand side. | ||||||||||
|
|
|
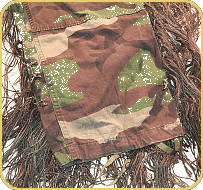
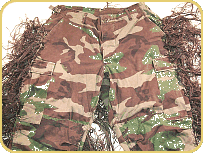
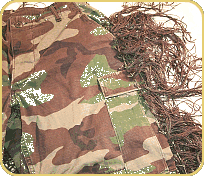
| STEP 5. Using the "Shoe Goo" glue all the outside netting edges to the pants. Glue on the knots as in the photos. If you have to glue a little at a time do so. You will only be able to glue the front, then wait at least 15-30 minute depending on the temperature before you can turn the pants over and glue the back edge. You may want to only glue the outside legs first, then let them dry about 15-30 minutes, then do the inside, then the rear. Click photo for larger view. | ||
|
|
|
|
|
| STEP 6. When the edges are dry, turn the pants over so the Jute side is facing you. Count 2-3 rows of netting squares over, and separate the jute so you can see the netting. Now, glue every knot all the way down. Wait another 15-30 minutes for the glue to dry enough to touch. Then count another 2-3 squares, part the jute, and glue every knot again. Click photo for larger view. |
|
|
| STEP 7. Take your Foam padding, and cut out the pieces for your legs, and elbows. Use a Dab of the "Shoe Goo" to affix in place. Let dry. | |||||||
|
|
|
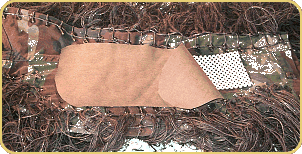
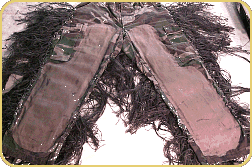
| STEP 8. Cut some canvas pieces so they will cover the foam padding you have already glued in place. Make sure you leave at least ½"- 1" extra canvas to overlap the foam padding. Now this is the messy part. Squeeze out some of the "Shoe Goo" on to your finger! Apply the glue to the underside of the ½" of overlapping canvas all the way around so as to glue the canvas onto the BDU's. You have to use your finger because it is the best way to smear the glue on to the fabric. Make sure your canvas completely covers the foam padding. Now let dry at least 24 hours depending on the temperature. Click photos for larger view. | |
|
|
|
|
| STEP 9. The Jacket. Lay out your remaining "Stalker" piece. | ||||||
|
| Examine the jacket closely!! Notice the sleeves are seemed close. And that the front piece goes all the way across to the other sleeve. Notice the jacket back piece is about 30", or 30 squares across. Look at where the sleeve is seemed at the Crotch of the arm, or armpit. With the suit facing you, start in the middle of the front piece and count up 5 squares. You are going to cut this front piece off, all the way across. BUT!! We want to save it so we can use it as a Rifle Wrap! So look at the diagram! Follow the 5 squares to the right or left until you get to a sleeve end. Now, cut on the 6th square, so you have the 5 remaining and cut all along the front to the other sleeve. |
||||||||||
|
| Now, fold this piece forward, and you will see it is still attached at the rear of the sleeve. Count up 7 squares from the side, and cut on the 8th, and cut toward the end of the sleeve to remove the front piece. You should have an open sleeve on the "Stalker" with 13", or 13 squares, and do the same for the other side. Now the front piece can be removed. NOW, if you cut off those remaining extra pieces on the front piece you just removed, you now have a small version of our Rifle Wrap!! |
 |
|
|
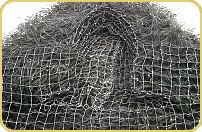
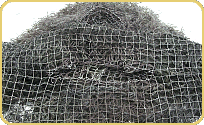
| STEP 10. With the sleeves folded open; look at the hood and how it is attached. Notice there are 4 knots seeming the hood together on one side, and either 4, or 5 on the other. The middle piece here we want to remove to open up the jacket. It is a piece 7 squares by 7, or 8 squares. Look at the next diagram. We want to remove this piece by starting at the front piece, and cutting up 7 squares until you reach the hood where it is seemed to the jacket netting. Now, do the same on the other side so the piece is removed, and now the jacket is open in the front. Click photos for larger view. | |
 |
 |
|
|
| STEP 11. Place your BDU jacket on top of the "Stalker" piece. Click photos for larger view. |
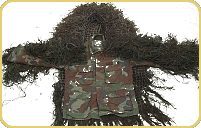 |
| Position sleeves on the netting so the under arm of the BDU sleeve is uncovered. Remember that we want to attach foam padding to the underarm of the jacket, and cover it with canvas. |
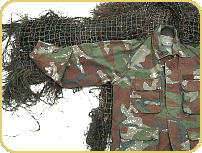 |
| Fold over the top of the sleeve, and pull the jute back to prepare for gluing. |
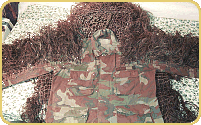 |
|
|
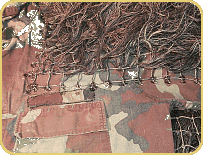
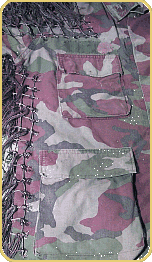
| STEP 12. Glue all edges of the netting to the BDU jacket. Make sure to glue on the knots. Again you may have to wait for a section to dry 15-30 minutes before you can continue. Click photos for larger view. | ||
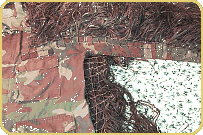 |
 |
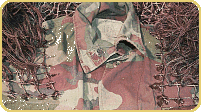 |
| On the sides, you may have to trim some off depending on the size of your BDU jacket. We used a Medium Regular in the directions, and had to trim 2-3 squares from each side. You want to make sure you have access to your pockets, and that the jute will not hang in the front to be pulled off when you crawl. We also cut away about 8-10" of the jute that hangs down over the top pockets. We felt this hindered us in our crawling. (! We have elected not to add padding to the front chest area. We feel after crawling in our suits, we didn't need it. We mainly used our elbows, and knees, and occasionally slid on our chest. It didn't warrant the loss of the pockets in the front. Of course if you want total chest coverage, use the left over foam, and canvas to cover the areas the same way as above.) |
||
 |
||
|
|
| STEP 13. Just like before, we want to count out 2-3 rows, separate the jute so the knots are exposed, and glue every knot all the way to the other side to secure the "Stalker" netting to the BDU jacket. Click photo for larger view. |
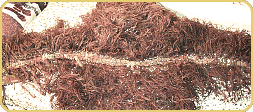 |
| When you go up to the hood area, make sure you glue heavy, and glue almost to the top of the shoulders. Glue a little bit, let it dry completely! Try it on. If you feel you need the hood up higher, that it is hanging down to low behind you, glue up another row. You can never have enough strength here! |
|
|
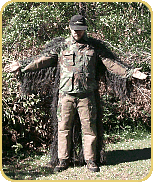
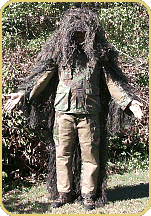
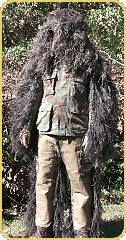
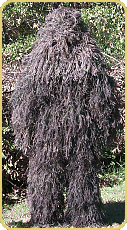
| Now you are finished. Take a look at some of the finished products. | |
 |
 |
 |
 |
|
|
| OUR
PRODUCTS || COLOR CHART
|| ORDER NOW
|| PHOTO GALLERY SPONSORSHIPS || BUILD YOUR OWN || LINKS || || CONTACT US || HOME |
|
|
 ©1999 Todd Muirhead/ www.ghilliesuits.com/ GhillieSuits.com™ and associated logos are trademarks of Todd Muirhead/www.ghilliesuits.com/ GhillieSuits.com or are used with permission of their respective owners. All rights reserved worldwide. No unauthorized duplication, reproduction, or distribution of this work, or any portion thereof, including in electronic form, may be made without the express, advance written permission of the publisher. Unauthorized use of this material, or any portion thereof, may result in severe civil and criminal penalties, and will be prosecuted to the fullest extent allowed by law. |
| info@ghilliesuits.com |
|
|
| web design by: Alpha Studios, Inc. |