 |
|
|
|
| To our valued customers:On this site, you will find details regarding the materials, method, and manner of construction of our "Patent Pending" ghillie suit and related products. These details are provided so that you can see the value, originality, and many benefits of our products. No license of any kind, express or implied, is granted in our placing these details on the site. Rather, we assert and retain all rights, without limitation in the ghillie suit and in its method and manner of construction. We appreciate your patronage and look forward to serving your needs." |
|
|
| Assembling your Ghillie Suit - Just follow these steps listed below! |
|
|
| 1. Lay your BDU's on the ground, and place the netting over them.Ā | ||||||||
|
|
|
| 2. Cut the netting so it will wrap around the arms. Make sure to only make the shown cuts. | ||||||||||
|
|
|
| 3. Wrap the netting around to the front of the BDU's, and cut to leave a 2x3 square piece, which will be used next. ĀĀĀĀĀĀ | ||||||||||
|
|
|
| 4. Place the left over 2x3" square on the front of the BDU's as in the photo. Now do the same for the Pants, take care as to not sew the Netting over were you will be wearing your belt. I started just below, but with your jacket hanging over, to cut down on weight, you can start sewing the netting on the pants just below the front pockets. Make your Jacket first to see were your jute hangs down to position the netting, or, just do what I did, and attach just below the belt line. | ||||||||||||
|
|
|
| 5. Cut a piece for the back face flap either 4x3 squares, or my favorite 5x5. You must also cut a piece of fabric to attach to this, I used another BDU jacket, since It was the same color. I cut it so I could get 3 hoods out of it, the back, and each arm cut and un-folded fit for a hood. make sure to keep the Camo side showing rather than my photo of the other side, I Goofed. This way when your not wearing the hood, it is still Camo. | ||||||||||
|
|
|
| Now comes the long man hours work. You must Sew the netting to the BDU's using Waxed Dental Floss, non-scented. Sew on every knot, making sure when you get to a pocket, deciding if you want to use the pocket or not. If so, make the proper cuts in the netting to allow use of the pockets. |
| When all knots have been sewn, and the netting is secure, use the Shoe Goo to put a dab on every sewn knot. This ensures the knot will not come apart, and your suit will last a long time. I'm sure you noticed upon completion that along the arms it is a little open. That is for when your a bow hunter, you need to have more room to pull back your bow, and not to interfere with the suit. |
|
|
|
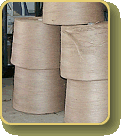
| 6. Now you have to cut your Burlap, or your Jute twine into 18" - 24" lengths. I will discuss the Jute twine, since I have tried the Burlap approach and felt it was to time consuming. |
|
|
|
| 7.
Next you need to Dye your Jute Twine to match your surroundings you will be wearing your suit in. I made 3 different suits, Mossy Oak, Desert Camo, and Woodland. I placed the Cut Jute on plastic hangers and dipped it into containers purchased at Wal-Mart. Then allowed them to dry. You will need to Dye more of your base color than any other color. Woodland Camo - Base color - Dark greenĀ Mossy Oak - Base color - Grey Desert Camo - Base color - Natural-light BrownĀĀĀ |
||||||||||
|
|
|
| 8. Now you need to attach the Jute Twine. Start by attaching a little of the base (about 4 strands) to every side of the square netting. You attach it by wrapping the Jute around a netting square, and tying a simple knot in the middle. Make sure you tie a knot in the middle, or else you will get a bunched up look. This is why I like my Jute Twine to be 18"-24" in length, it offers better coverage, with a non-bunched up look.ĀĀĀĀ | |||||||||||||||||
| When the base is completely covered, start by adding the other colors, Black next, with Dark brown, lighter brown, greens, lighter greens. Look at a Camo shirt to get the idea, that's why I like the Mossy tree bark, it has a great look that adapts to anything. (When in the field, you can always add tree branches to the netting, or other leaves etc, to add to the look.) Make sure when attaching the Jute to periodically lift the suit and give it a good shaking to fluff up the material and get it to lay flat, to see what it looks like, and to make sure you have enough coverage, and not to much over coverage, as it can get heavy if you attach to much. |
|
||||||||||||||||
|
|
| OUR
PRODUCTS || COLOR CHART
|| ORDER NOW
|| PHOTO GALLERY SPONSORSHIPS || BUILD YOUR OWN || LINKS || || CONTACT US || HOME |
|
|
 ® 2005 Todd Muirhead/ www.ghilliesuits.com/
GhillieSuits.com? and associated logos are trademarks of Todd Muirhead/www.ghilliesuits.com/
GhillieSuits.com or are used with permission of their respective owners.
All rights reserved worldwide. No unauthorized duplication, reproduction,
or distribution of this work, or any portion thereof, including in
electronic form, may be made without the express, advance written
permission of the publisher. Unauthorized use of this material, or any
portion thereof, may result in severe civil and criminal penalties, and
will be prosecuted to the fullest extent allowed by law. Warning!
Jute thread is flammable. Please
avoid open flames, sparks, or other items that could ignite the material.
Do not smoke while wearing your suit.
All of our wearable garments are sprayed with a Fire-retardant
spray. All Ghillie kits come with one lb. of a Dry Fire-retardant
powder that the customer mixes with water and applies to his/her suit.
We recommend Dry cleaning only. If you wash your suit with water,
the fire-retardant must be re-applied. We offer the Dry
Fire-retardant on our website for re-applying to your suit. |
| info@ghilliesuits.com |
|
|
| web design by: Alpha Studios, Inc. |